Posted on

Transform Your Bathroom with Elegant Showers Australia: Design Tips and Trends

View of elegant showers Australia showcasing sophisticated designs and modern aesthetics.

Understanding Elegant Showers Australia

What Defines Elegant Showers?

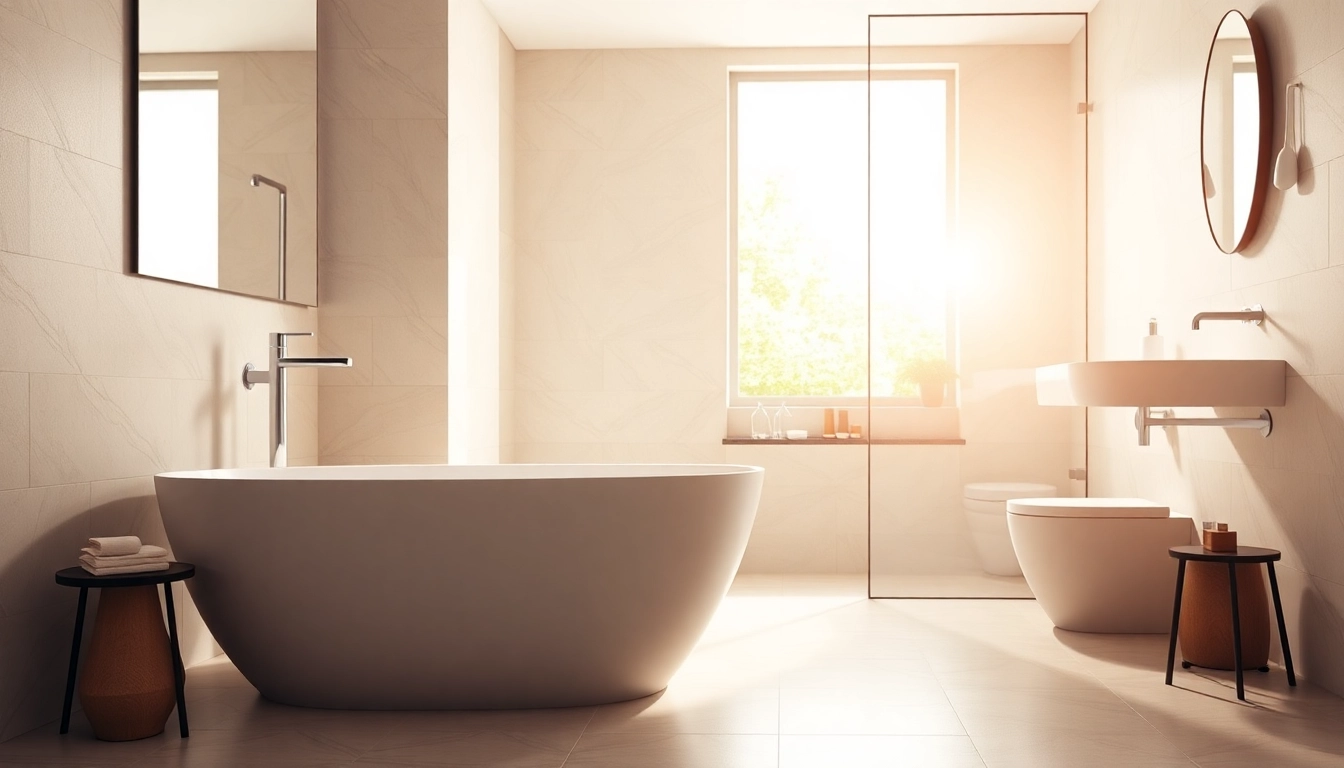
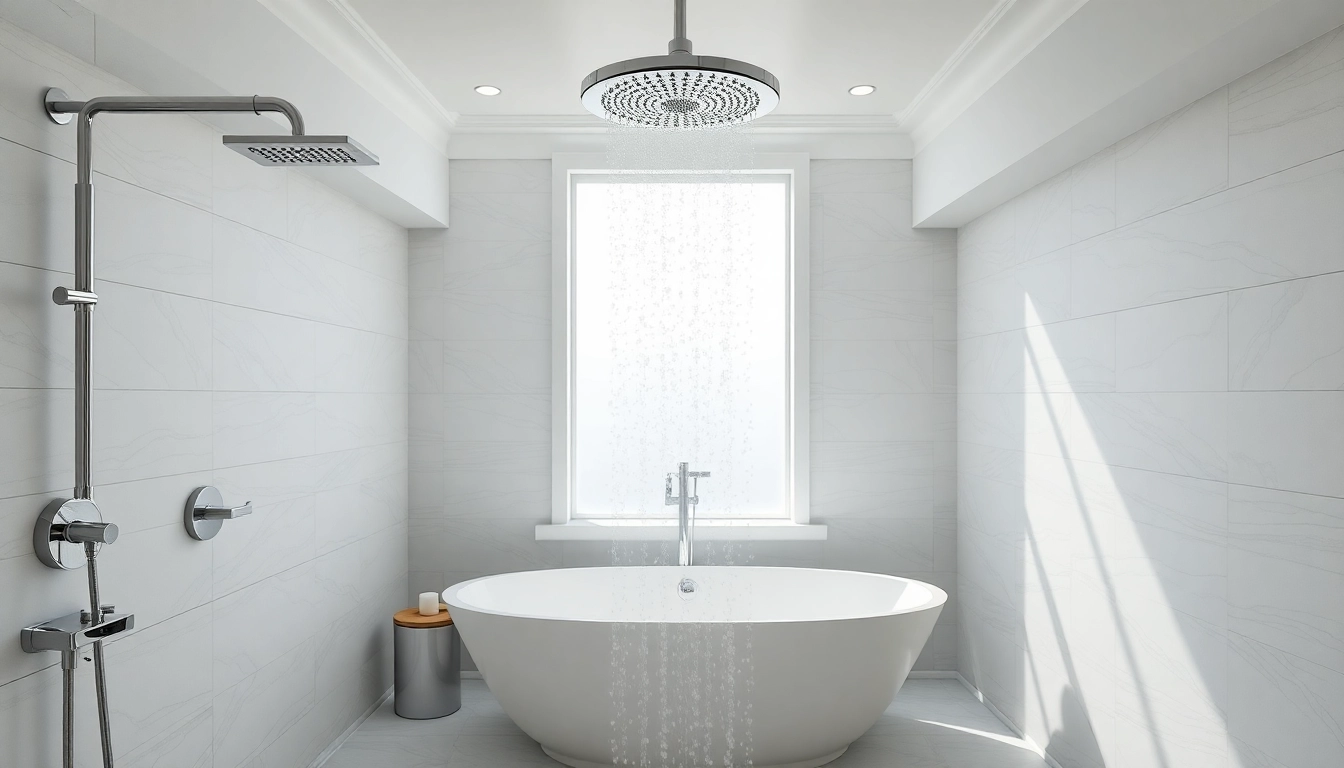
Elegant showers represent the pinnacle of modern bathroom design, merging functionality with aesthetic appeal. These showers are typically characterized by high-quality materials, sophisticated design elements, and an emphasis on comfort and luxury. An elegant shower is not just a space for hygiene; it is an experience that elevates the entire bathroom environment, transforming it into a serene retreat. By incorporating sleek lines, advanced technology, and enchanting features, elegant showers cater to homeowners seeking both beauty and practicality. To explore various options for elegant showers, visit elegant showers Australia.

Key Features to Look for

  • Quality Materials: Opt for durable materials such as tempered glass, porcelain, and high-grade stainless steel that can withstand daily use while maintaining their beauty.
  • Elegant Fixtures: Choose showerheads and controls that showcase innovative designs, including rain showerheads and thermostatic valves, enhancing both form and function.
  • Water Efficiency: Look for models that offer water-saving features without sacrificing performance, which can contribute to lower utility bills and sustainability.
  • Adequate Space: Consider the layout and size of the shower, ensuring it provides enough room for comfortable movement and privacy.
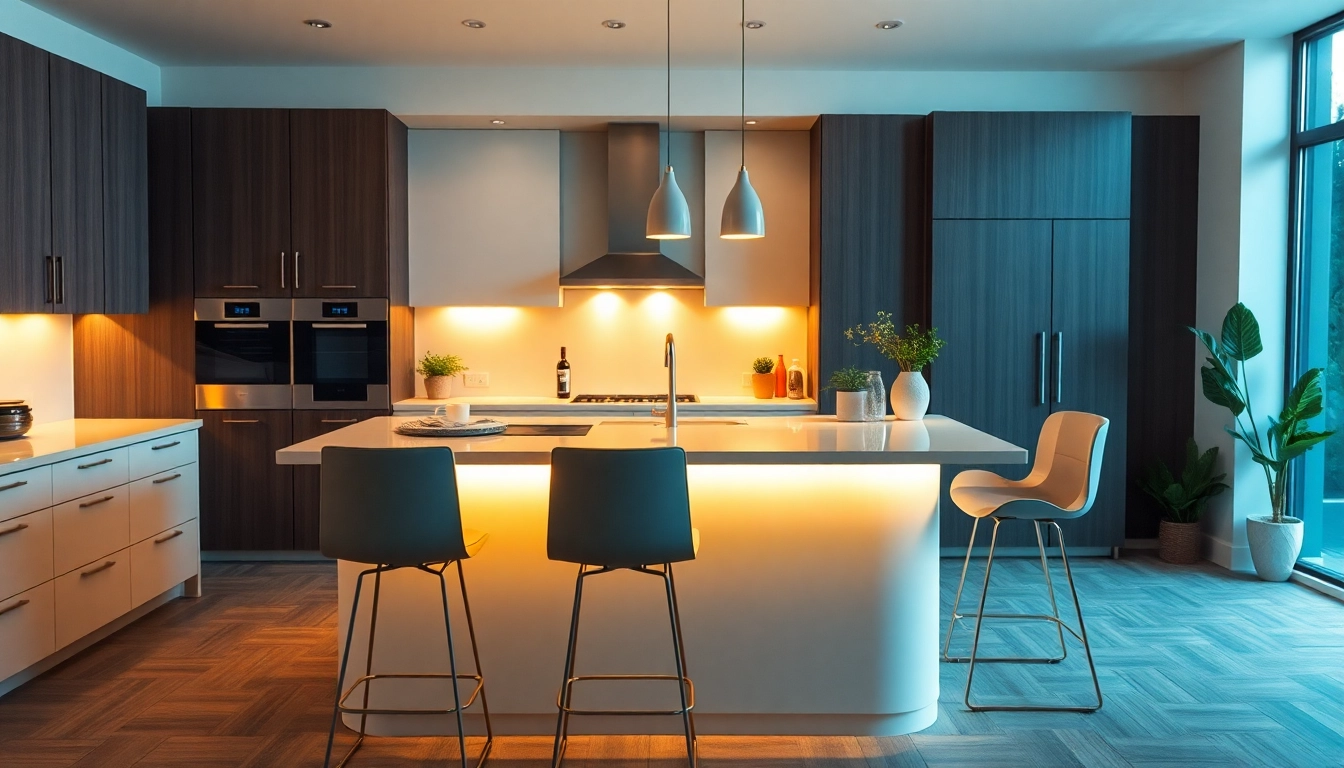
  • Lighting Solutions: Integrated lighting can create a calming atmosphere, perfect for unwinding at the end of a day.

Benefits of Choosing Elegant Showers

Investing in an elegant shower can yield a multitude of benefits. Firstly, it can significantly enhance the visual appeal of your bathroom, contributing to a more cohesive and luxurious home aesthetic. Secondly, an elegant shower often features advanced technologies, such as adjustable lighting and temperature controls, allowing users to customize their experience. Additionally, the integration of water-saving technologies not only supports environmental sustainability but also reduces water bills. Lastly, these showers can increase your property value, attracting potential buyers who appreciate well-designed bathrooms.

Styles and Trends in Elegant Shower Design

Exploring Different Shower Styles

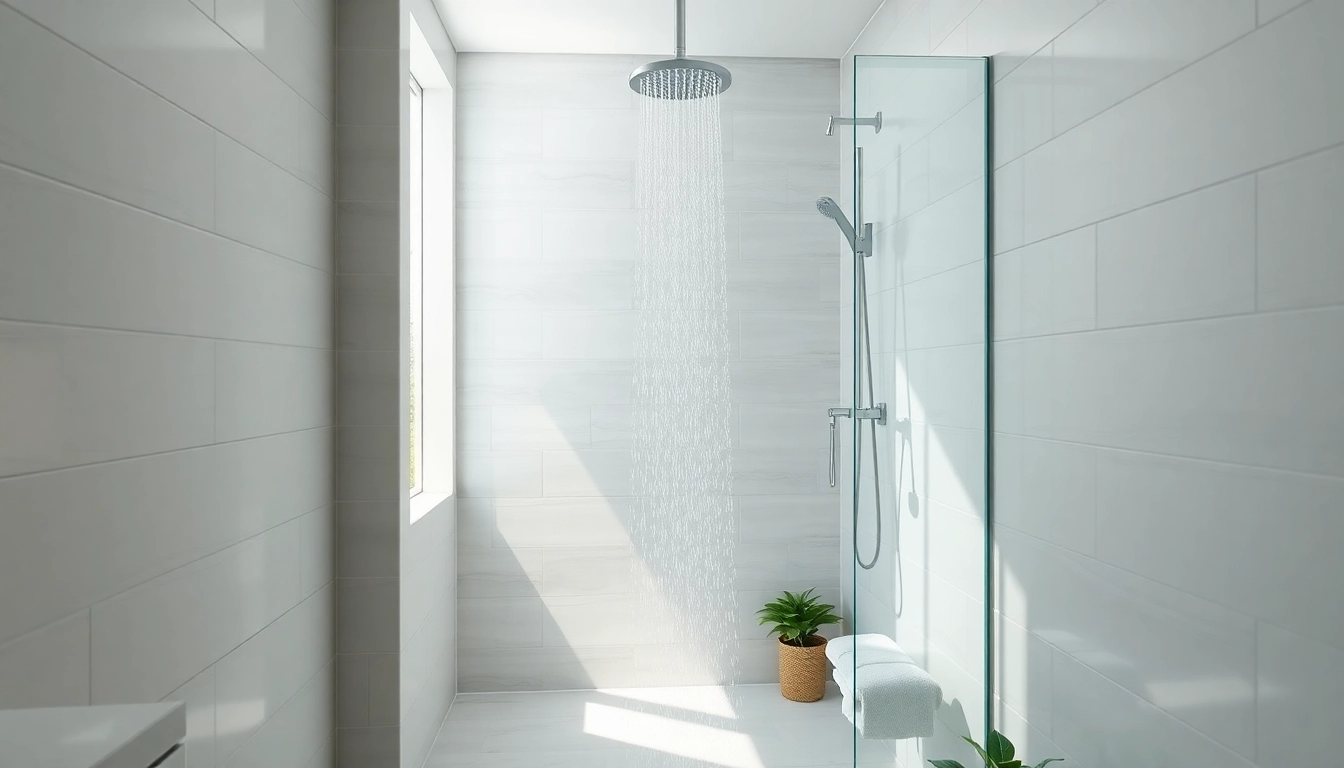
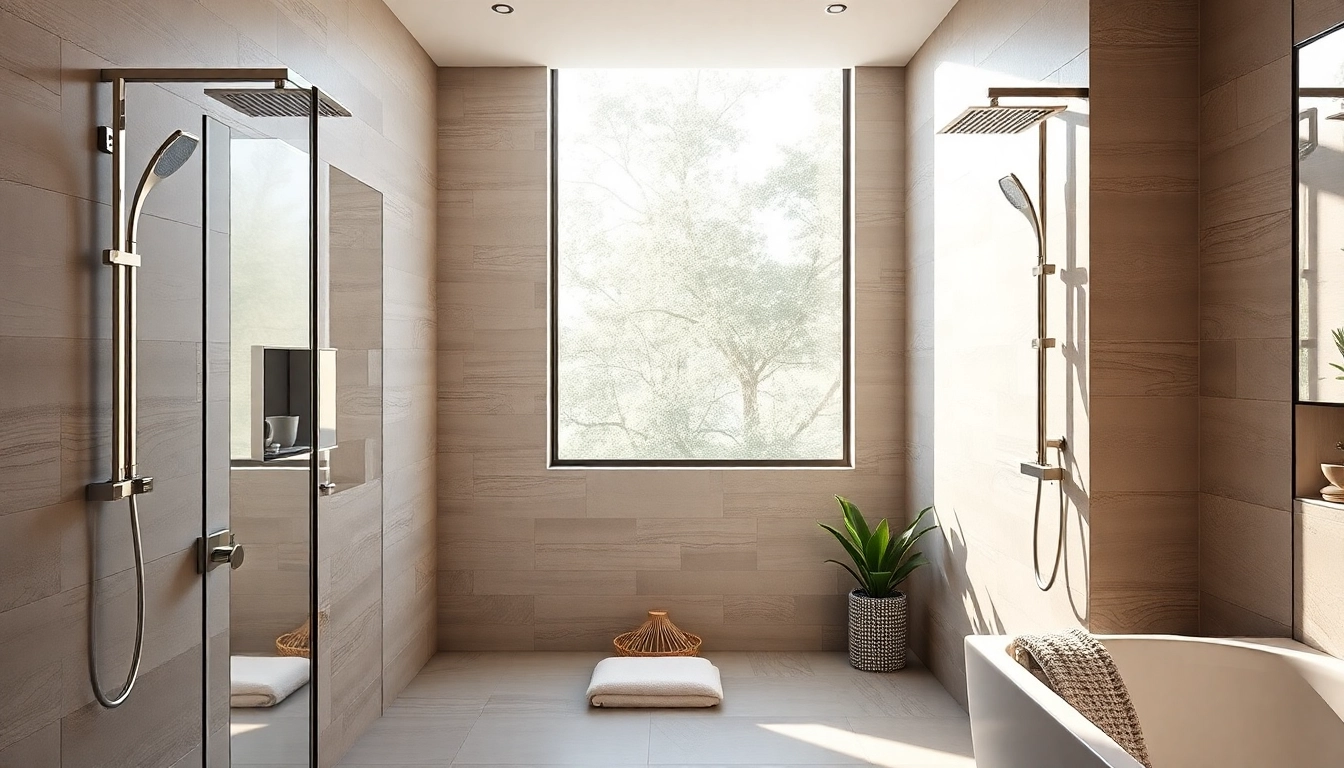
When it comes to elegant showers, various styles cater to different tastes and bathroom designs. Walk-in showers, known for their spaciousness and accessibility, are a popular choice among homeowners. They feature glass enclosures that create an open feel while allowing ample light. Curved showers offer a contemporary twist, ideal for modern spaces, while freestanding options evoke a luxury spa ambiance. Furthermore, utilizing tiles in unique layouts or color palettes can elevate the design and personalize the shower space. Understanding these styles helps narrow down choices that reflect your individual taste and fit your bathroom layout.

Current Trends in Bathroom Aesthetics

Current trends in bathroom design emphasize minimalism and sustainability. Neutral color palettes create a soothing backdrop, complemented by natural materials like wood and stone to introduce warmth. Additionally, the trend for bold statement pieces is notable, whether through accent wall tiles or unusual fixtures such as geometric showerheads. Smart technology is also becoming increasingly integrated into bathroom designs, from digital controls for water temperature and pressure to automated lighting systems, ensuring convenience and adaptability.

Combining Functionality and Design

The best elegant showers seamlessly merge functionality with aesthetics. Consideration of layout is crucial; ensuring the shower space allows for ease of movement while being visually appealing. Storage solutions, like recessed shelves or ledges, provide practical organization without compromising style. The incorporation of smart technology can further enhance user experience, from adjustable shower sprays to integrated sound systems, making every shower an enjoyable and luxurious experience. Ultimately, the combination of design and functionality should reflect personal preferences while maximizing the usability of the space.

Installation Considerations for Elegant Showers Australia

Preparing Your Bathroom Space

Before installation, proper preparation of the bathroom space is essential. Ensure that the plumbing meets the specific requirements of the new shower and assess the existing layout for compatibility with your chosen style. It’s also important to consider the accessibility of the shower, particularly for those with mobility issues. Proper waterproofing is vital to prevent damage and mold, especially in areas prone to moisture. Take time to eliminate any old structures or features that may hinder the installation, providing a clean slate for your luxurious new shower.

Choosing Professional Installation vs. DIY

Deciding between professional installation and a DIY approach depends on your skill level and the complexity of the shower system. Professional installers possess the expertise to handle plumbing and electrical requirements safely and efficiently, which can save time and prevent costly errors. Conversely, if you have experience in home improvement projects and the installation guidelines are straightforward, embarking on a DIY project may be rewarding and cost-effective. Always weigh the potential risks and benefits before making a decision.

Common Mistakes to Avoid

When installing an elegant shower, several common mistakes should be avoided. Failing to measure the space accurately can lead to poor fitting, while neglecting proper waterproofing can cause long-term water damage. Choosing the wrong materials for the environment or insufficient plumbing modifications can also complicate the installation process. Additionally, overlooking accessibility considerations can limit the usability of the shower for some users, detracting from its intended elegance. Planning thoroughly and consulting experts can help mitigate these issues.

Maintenance of Elegant Showers

Best Practices for Upkeep

To keep an elegant shower looking its best, regular maintenance is key. Rinse the shower after each use to prevent soap scum and mineral buildup, and use a squeegee to remove excess water from shower walls. Scheduling deep cleans weekly, using suitable non-abrasive cleaners, will help maintain the finish of both the fixtures and surfaces. Inspect and clean any drainage systems regularly to ensure proper water flow and prevent clogs, maintaining the overall functionality of the shower.

Products to Use for Cleaning

Choosing the right cleaning products is essential to preserving the elegance of your shower. Opt for pH-balanced and non-abrasive cleaners, specifically designed for the materials your shower features, whether glass, tile, or metal. Avoid harsh chemicals that may cause stains or corrosion. Eco-friendly cleaning solutions can be effective while also protecting the environment. Regular use of a mild soap solution can also keep surfaces shining without damaging the elegant finishes.

Tips to Extend Lifespan and Shine

To extend the lifespan and maintain the shine of your elegant shower, focus on preventive care. Applying a protective sealant on tiles and grout can repel water and stains, while regularly polishing metal fixtures can prevent tarnishing. Keep an eye on any signs of wear or damage, and address these promptly to prevent more extensive repairs in the future. Incorporating a weekly maintenance routine will go a long way in ensuring your shower stays elegant for years to come.

FAQs About Elegant Showers Australia

What Makes a Shower Elegant?

An elegant shower combines high-quality materials, refined designs, and functional features, creating a visually appealing and luxurious space.

How Do I Choose the Right Shower?

Consider your space, desired style, and essential features, balancing aesthetics and functionality for a personalized choice that meets your needs.

What Materials Are Best for Elegant Showers?

Quality materials like tempered glass, ceramic tiles, and stainless steel offer durability and aesthetic appeal, perfect for elegant shower designs.

Can I Install a Shower Myself?

If you have the necessary skills and follow guidelines carefully, DIY installation is possible; however, professional help is advisable for complex setups.

How Do I Maintain My Shower?

Regular cleaning with appropriate products, daily rinsing, and periodic deep cleaning can preserve the look and functionality of your elegant shower.

Posted on

Mastering Beautiful Bathroom Installation Trafford for Your Dream Home

Stunning bathroom installation trafford showcasing modern fixtures and serene ambiance.

Understanding the Basics of Bathroom Installation Trafford

When embarking on bathroom installation trafford, it’s crucial to understand the fundamental elements that contribute to a functional and aesthetically pleasing space. The bathroom is not just a utility area; it’s a personal sanctuary that should reflect your style while serving its purpose efficiently. Thus, a well-thought-out design is critical for making the most out of your space.

Key Elements of Bathroom Design

Bathroom design involves a mix of aesthetics and utility. Here are some key elements to consider:

  • Layout: The arrangement of fixtures—like the toilet, sink, and shower—affects the space’s usability.
  • Lighting: Effective lighting enhances functionality and sets the ambiance. Consider a mix of natural light and layered artificial lighting.
  • Color Palette: Choosing the right colors can make a small bathroom feel larger. Light hues can provide an airy feel while darker shades add sophistication.

Planning Your Space Efficiently

Proper planning is essential for optimizing your bathroom’s space. Start by measuring your area accurately to determine the best layout. Think about:

  • Flow: Ensure enough room to move without obstacles.
  • Storage: Incorporate cabinets and shelving that fit your design without overwhelming the space.
  • Fixtures: Choose compact fixtures for smaller bathrooms to maximize space.

Essential Tools for Installation

Having the right tools can simplify your bathroom installation project. Key tools include:

  • Power Drill: For making holes in walls and securing fixtures.
  • Level: Ensures that your tiles and fixtures are perfectly aligned.
  • Plumbing Wrench: Easily tightens or loosens various plumbing fixtures.

Choosing Materials for Bathroom Installation Trafford

Selecting the right materials during your bathroom installation is pivotal for durability and style. Different options cater to different needs, preferences, and budget considerations.

Quality Fixtures and Fittings

{Quality fixtures are key to a successful bathroom installation.} Investing in quality faucets and sinks ensures longevity and enhances the overall aesthetic. Look for brands that offer corrosion resistance and durability, as these factors are crucial for bathroom environments where moisture exposure is high.

Popular Tile Options and Their Benefits

Tiling is an essential aspect of bathroom installation. Some popular tile choices include:

  • Ceramic: Durable and easy to clean, available in many colors and patterns.
  • Porcelain: Waterproof and highly resistant to scratches and stains, perfect for high-traffic areas.
  • Natural Stone: Offers unique beauty but requires more maintenance; ideal for a luxurious look.

Eco-Friendly Material Choices

In today’s eco-conscious market, there are many sustainable materials available:

  • Bamboo: A renewable resource that’s increasingly used for bathroom furniture.
  • Recycled Glass Tiles: Stunning and sustainable, adding a unique touch to your space.
  • Low-VOC Paints: To maintain better air quality in your bathroom.

Steps for a Successful Bathroom Installation Trafford

A successful bathroom installation follows several key steps that ensure the project is executed smoothly.

Pre-Installation Preparation Guidelines

Before starting any physical work, prepare meticulously. Begin with:

  • Demolition: Carefully remove old fixtures and tiles, ensuring to protect plumbing and electrical systems.
  • Inspection: Check for any leaks or damages.
  • Design Sketching: Have a clear drawing or 3D model to visualize your end goal.

Executing the Installation Process

Implement the following steps during installation:

  • Rough-in Plumbing and Wiring: Install the necessary plumbing and electrical systems according to codes and standards.
  • Wall and Floor Tiling: Start with the floor and then the walls, ensuring to follow the planned design and layout.
  • Install Fixtures: Once tiles are set, install your sink, toilet, and other fixtures following manufacturer instructions.

Finalizing Finishes and Details

Once everything is in place, attention to detail is vital. This includes:

  • Sealing grout and gaps: Prevents water damage by using waterproof sealants.
  • Installing accessories: Such as mirrors, towel bars, and shelves to complete the look.
  • Final Inspection: Go through everything to ensure all installations are secure and functional.

Common Challenges in Bathroom Installation Trafford

Even with careful planning, issues can arise during installation. Identifying common challenges can help mitigate potential problems.

Dealing with Plumbing Issues

Plumbing problems can arise unexpectedly. Common issues include:

  • Sweating pipes that can lead to water damage.
  • Leaky faucets that waste water and increase your bill.
  • Blockages due to improper fittings.

Always ensure plumbing aligns with local codes and consider hiring a professional for complex systems.

Managing Electrical Requirements

Electrical safety is paramount in a wet environment like a bathroom. Key tips include:

  • Ensure all electrical installations are compliant with regulations.
  • Use GFCI outlets in wet areas to prevent electrical shocks.
  • Plan your lighting to avoid excess dampness and ensure functionality.

Ensuring Compliance with Regulations

Adhering to local building codes and regulations is crucial. Key points include:

  • Getting necessary permits before starting.
  • Adhering to safety standards in your fixtures and fittings.
  • Consulting with local authorities to ensure compliance.

Maintenance Tips Post Bathroom Installation Trafford

Your work doesn’t end after installation. Regular maintenance ensures your bathroom remains a comfortable and appealing space.

Keeping Your Fixtures Sparkling Clean

To maintain a clean and hygienic space, follow these tips:

  • Use non-abrasive cleaners suitable for each surface.
  • Establish a cleaning schedule to prevent buildup of grime and soap scum.
  • Regularly check for leaks to prevent larger issues down the line.

Regular Maintenance Tasks

Consistency is key in bathroom upkeep. Implement the following maintenance tasks:

  • Inspect caulking and grout every few months and reapply if necessary.
  • Test your plumbing fixtures for leaks during seasonal changes.
  • Monitor humidity levels to prevent mold and mildew.

When to Seek Professional Help

While some issues can be handled independently, others require professional assistance. Consider calling a specialist when:

  • You detect persistent leaks that are difficult to trace.
  • Your plumbing or electrical systems require extensive repairs.
  • You wish to undertake more complex renovations or upgrades.

FAQs

What factors affect the cost of bathroom installation trafford?

The cost varies based on materials, sizes, fixtures, and labor involved. Always budget accordingly for unexpected expenses.

How long does a typical bathroom installation take?

A standard bathroom installation can take 1 to 3 weeks, depending on the complexity and the number of upgrades.

Can I install a bathroom by myself?

DIY bathroom installations are possible but require plumbing and electrical knowledge; otherwise, hiring a professional is advisable.

What are the most popular styles for bathroom installations?

Popular styles include modern, minimalist, traditional, and farmhouse, each offering distinctive aesthetics and functionalities.

How can I optimize bathroom space during installation?

Utilizing vertical storage, compact fixtures, and smart layouts can effectively maximize limited bathroom space.

Posted on

Effizientes Arbeiten im Wintergarten als Buero: Kreative Loesungen fuer Ihr Home-Office

Wintergarten als Buero mit stylischem Home-Office und moderner Ausstattung

1. Was ist ein Wintergarten als Buero?

1.1 Definition und Merkmale

Ein Wintergarten als Buero ist eine spezielle Art von Wintergarten, der als Arbeitsraum konzipiert ist. Er kombiniert die Funktionalitaet eines Bueros mit der aesthetischen Anziehungskraft eines verglasten Raumes, der das Tageslicht maximiert und gleichzeitig eine angenehme Umgebung schafft. Zu den typischen Merkmalen gehoeren grosse Fensterflaechen, hochwertige Materialien sowie ein durchdachtes Klima- und Lichtkonzept. Der Wintergarten kann als separates Gebaeude oder als Anbau an ein bestehendes Gebaeude gestaltet werden.

1.2 Vorteile eines Wintergartens fuer die Arbeitsumgebung

Die Entscheidung, einen Wintergarten als Buero zu nutzen, bringt zahlreiche Vorteile mit sich. Dazu zaehlen:

  • Natuerliches Licht: Die grossen Fenster sorgen fuer eine helle, einladende Atmosphaere, die die Kreativitaet und Produktivitaet steigern kann.
  • Aesthetik: Ein Wintergarten bietet einen schoenen Ausblick auf die Natur und schafft eine inspirierende Arbeitsumgebung.
  • Flexibilitaet: Der Raum kann je nach Bedarf unterschiedlich genutzt werden, sei es als Besprechungsraum, Bueroraum oder Entspannungszone.
  • Bewegung: Durch die Verbindung zur Natur koennen Mitarbeiter frische Luft und Bewegung geniessen, was sich positiv auf die Gesundheit auswirkt.

1.3 Unterschiedliche Designs von Wintergaerten

Wintergaerten sind in verschiedenen Designs erhaeltlich, die auf individuelle Beduerfnisse und Stilrichtungen abgestimmt werden koennen:

  • Traditionell: Klassische Modelle mit Holzrahmen und warmen Farben.
  • Modern: Glatte Linien und minimalistische Ansaetze, oft mit Aluminiumrahmen.
  • Exklusiv: Massgeschneiderte Designs, die besondere architektonische Elemente integrieren.

2. Die Planung eines Wintergartens als Buero

2.1 Standortwahl und Ausrichtung

Die Standortwahl ist entscheidend fuer die Funktionalitaet eines Wintergartens. Es ist wichtig, den Raum optimal auszurichten, um den Tageslichteinfall zu maximieren und Hitzestaus zu vermeiden. Eine Ausrichtung nach Sueden sorgt in den meisten Faellen fuer die beste Lichtverhaeltnisse, waehrend eine nach Norden orientierte Flaeche kuehler bleibt, aber weniger Sonnenlicht abbekommt. Bei der Planung sollten auch die herrschenden Windverhaeltnisse und moegliche Verschattungen durch umliegende Baeume oder Gebaeude beruecksichtigt werden.

2.2 Genehmigungen und rechtliche Aspekte

Je nach Groesse und Art des geplanten Wintergartens sind moeglicherweise Baugenehmigungen erforderlich. Es ist wichtig, sich im Vorfeld ueber die rechtlichen Rahmenbedingungen zu informieren. Dazu zaehlen unter anderem Vorschriften zur Fassadengestaltung, Grenzabstaende und gegebenenfalls Denkmalschutzauflagen, die beachtet werden muessen, um rechtliche Probleme zu vermeiden.

2.3 Budgetierung und Kostenanalyse

Die Kosten fuer einen Wintergarten koennen stark variieren. Eine detaillierte Budgetplanung ist essenziell. Zu den wichtigsten Kostenpunkten zaehlen:

  • Materialkosten: Die Wahl der Fenster- und Rahmenmaterialien hat einen starken Einfluss auf die Gesamtkosten.
  • Innenausstattung: Mobiliar, Beleuchtung und technische Ausstattung erhoehen die Investitionssumme.
  • Installation: Kosten fuer den Bau oder die spezielle Einbringung koennen erheblich sein.

3. Gestaltungselemente fuer einen effektiven Arbeitsraum

3.1 Ergonomische Moebel und Ausstattung

Die Auswahl ergonomischer Moebel ist entscheidend fuer eine gesunde Arbeitsweise. Ein hoehenverstellbarer Schreibtisch ermoeglicht es, zwischen Sitzen und Stehen zu wechseln. Ergonomische Stuehle sorgen fuer eine korrekte Haltung und verhindern Rueckenprobleme. Auch die Ausstattung mit praktischen Stauraumloesungen und intelligenten Arbeitsbereichen ist wichtig, um Ordnung zu halten und die Produktivitaet zu foerdern.

3.2 Beleuchtung und Akustik

Die richtige Beleuchtungstechnik ist entscheidend. Neben ausreichend Tageslicht sollten auch kuenstliche Lichtquellen strategisch platziert und dimmbar sein, um eine angenehme Lichtatmosphaere zu schaffen. Akustische Massnahmen, wie Akustikpaneele oder Teppiche, helfen dabei, die Geraeuschkulisse zu regulieren und eine konzentrierte Arbeitsumgebung zu gewaehrleisten.

3.3 Integration von Technologie

Die technologische Ausstattung ist ein weiterer entscheidender Faktor. Hochgeschwindigkeits-Internet, sichere Stromversorgung und geeignete Leitungen fuer Zusatzgeraete wie Drucker und Scanner sollten eingeplant werden. Zudem koennen moderne Smart-Home-Loesungen, wie automatisierte Rolllaeden und Beleuchtungssysteme, zur Steigerung der Effizienz im Arbeitsalltag beitragen.

4. Pflege und Instandhaltung eines Wintergartens als Buero

4.1 Pflanzenpflege und Raumklima

Pflanzen im Wintergarten tragen nicht nur zur Aesthetik bei, sondern verbessern auch das Raumklima. Zu den pflegeleichten Pflanzen gehoeren Zweige von Indoor-Baeumen, sowie Luftreinigungsanlagen, die Staub und Schadstoffe filtern. Es ist wichtig, regelmaessig fuer die richtige Bewaesserung und Duengung zu sorgen und die Pflanzen auf Schaedlinge zu ueberpruefen.

4.2 Wartung der Glas- und Rahmenelemente

Die Instandhaltung der Glas- und Rahmenelemente ist unerlaesslich, um eine lange Lebensdauer des Wintergartens zu gewaehrleisten. Dazu gehoeren regelmaessige Reinigungen der Fenster, das Ueberpruefen auf Risse und das Versiegeln der Rahmen. Ausserdem muessen Dichtungen und Funktionsmechanismen regelmaessig gewartet werden, um Schaeden und Energieverluste zu vermeiden.

4.3 Reinigung und Desinfektion des Arbeitsbereichs

Ein sauberer Arbeitsbereich steigert die Produktivitaet und traegt zur Gesundheit bei. Die Reinigung sollte regelmaessig erfolgen, wobei auf umweltfreundliche Reinigungsmittel geachtet werden sollte, um die Raumluft zu schonen. Desinfektionsmassnahmen, besonders in der Pandemiezeit, sind ebenfalls wichtig, um ein hygienisches Arbeitsumfeld aufrechtzuerhalten.

5. Haeufige Fragen zu Wintergarten als Buero

5.1 Wie viel kostet ein Wintergarten als Buero?

Die Kosten fuer einen Wintergarten als Buero variieren je nach Groesse, Material und Ausstattung. Rechnen Sie mit einem Budget ab 10.000 Euro bis zu 50.000 Euro oder mehr.

5.2 Welche Pflanzen sind geeignet fuer einen Wintergarten?

Geeignete Pflanzen sind pflegeleicht, luftreinigend und bringen Farbe ins Buero. Beispiele sind Gruenlilien, Efeututen oder grosse Zimmerpflanzen wie die Monstera.

5.3 Wie viel Licht benoetigt ein Home-Office im Wintergarten?

Ein Home-Office im Wintergarten sollte idealerweise Tageslicht waehrend der Arbeitszeit erhalten. Eine Ausrichtung nach Sueden maximiert den Lichteinfall.

5.4 Wie kann ich Stauraum im Wintergarten schaffen?

Nutzen Sie intelligente Moebelloesungen wie Regale, Schraenke oder multifunktionale Moebel. Versteckte Faecher und modulare Moebel helfen, Platz zu sparen.

5.5 Sind Wintergaerten auch im Winter nutzbar?

Ja, Wintergaerten sind bei entsprechender Isolierung auch im Winter nutzbar. Eine gute Heizung sorgt fuer eine angenehme Temperatur.

Posted on

Effective and Affordable Bed Bug Treatment Options for Your Home

Examine bed bugs with affordable bed bug treatment in a clean home setting by a professional.

Understanding Bed Bugs

What are Bed Bugs?

Bed bugs are small, reddish-brown insects belonging to the Cimex lectularius species, known for feeding on human blood, often at night. These nocturnal pests are about the size of an apple seed and are characterized by their flat, oval bodies, making them easy to hide in crevices and seams of furniture, mattresses, and walls. Their resilience and adaptability are key reasons why they pose challenges to effective removal.

Signs of Infestation

Detecting bed bugs early is crucial for a successful affordable bed bug treatment. Common signs include:

  • Physical Sightings: Spotting live bugs, especially near sleeping areas.
  • Exoskeletons: Finding shed skins or molted casings in infested areas.
  • Rusty Stains: Dark spots on linens from crushed bugs.
  • Eggs: Tiny, white, and oval-shaped eggs typically found in clusters.

The Life Cycle of Bed Bugs

The life cycle of bed bugs consists of five nymph stages before reaching maturity. Each stage requires a blood meal to molt and progress. This cycle can take about 6 weeks under optimal conditions, which means prompt action is necessary to avoid a larger infestation. Understanding their life cycle is essential in identifying treatment timing and strategies.

Challenges of Affordable Bed Bug Treatment

Common Misconceptions

Many believe bed bugs are solely a result of unclean living conditions; however, they can thrive in pristine environments as they hitch rides on luggage, clothes, and second-hand furniture. This misconception leads to stigma and can potentialize the spread and infestation without appropriate measures.

Barriers to Effective Treatment

Access to effective treatment can be hindered by various factors, including financial constraints, lack of knowledge, and the complexity of the pest itself. Many residents may forego professional assistance due to costs or uncertainty about DIY solutions, often resulting in failed attempts and a prolonged infestation.

Social Impact and Solutions

Bed bug infestations disproportionately affect low-income communities, creating social distress and mental health issues due to the stigma involved. Community programs offering affordable or subsidized extermination services can alleviate this burden, allowing these residents to reclaim their spaces and wellness.

DIY Methods for Affordable Bed Bug Treatment

Natural Remedies

Many homeowners attempt DIY treatments due to budget constraints. Natural remedies such as essential oils (e.g., tea tree, lavender) have shown some efficacy by disrupting the insects’ nervous systems. Diatomaceous earth, a fine powder that dehydrates bugs, can also be scattered in affected areas.

Step-by-Step DIY Guide

If you choose to tackle the problem yourself, consider these steps for an effective DIY treatment:

  1. Declutter: Remove unnecessary items from your home to reduce hiding spots.
  2. Wash and Dry: Launder all bedding, curtains, and clothing on high heat.
  3. Vacuum: Regularly vacuum couches, beds, and all potential bug habitats.
  4. Apply Treatments: Use your chosen method (natural remedies or pesticides) in accordance with instructions.
  5. Seal and Monitor: Use encasements for mattresses and box springs, and monitor with traps.

Effective Tools and Supplies

Investing in some tools can enhance the effectiveness of DIY treatments. Essential items include:

  • Steam Cleaner: High heat can eliminate bed bugs on contact.
  • Diatomaceous Earth: A natural desiccant to dehydrate pests.
  • Pesticides: If opting for chemical solutions, select products specifically labeled for bed bugs.
  • Bed Bug Traps: Monitoring traps can help gauge the severity of the infestation.

Professional vs. DIY: Making the Right Choice

Cost Comparison

While DIY methods may appear more cost-effective initially, professional intervention can be more efficient in the long run, as eliminating an established infestation may require expertise and resources that most homeowners lack. Comparing costs between methods is essential for making informed decisions about treatment options.

Time Investment

DIY treatments can be time-consuming, requiring frequent monitoring and reapplication. In contrast, professional extermination typically involves a one-time treatment with follow-up checks, reducing overall time spent managing the problem.

Long-term Effectiveness

While DIY methods can provide temporary relief, they often lack the thoroughness of professional services. Comprehensive treatment can offer a stronger long-term solution, as pest control experts target the entire lifecycle of the pest and implement preventive measures.

Preventing Future Infestations

Best Practices for Home Maintenance

Prevention is often the best cure. Regular home maintenance practices, such as checking for cracks in walls or around windows, can stave off future infestations. Regular cleaning of furniture and keeping storage areas organized will make it harder for bed bugs to establish residency.

Regular Inspections and Monitoring

Incorporating periodic inspections of your living spaces can help catch infestations early. Using monitoring devices or traps can also provide peace of mind and awareness before infestations become severe.

Community Resources and Support

Many communities offer resources such as pest control workshops or access to treatment grants for low-income families. Engaging with local pest control initiatives can provide helpful knowledge and solutions that prevent infestations.

Frequently Asked Questions

What should I do first if I suspect a bed bug infestation?

Start by thoroughly inspecting your sleeping area, looking for signs like bites, shed skins, or bug stains. Declutter the area and begin cleaning linens while considering treatment options.

How effective are natural remedies for bed bugs?

Natural remedies can provide some relief but are generally less effective than professional treatments or well-formulated insecticides. They are best used as part of a comprehensive plan.

Can I treat bed bugs on my own?

Yes, many homeowners successfully manage bed bugs through DIY techniques. However, significant infestations may require professional intervention for complete eradication.

How often should I inspect my home for bed bugs?

Regular inspections are recommended, especially after travel or purchasing used furniture. Aim to inspect your living spaces every few months as a proactive measure.

What is the best long-term strategy to prevent bed bugs?

Maintaining a clean environment, routinely washing bed linens, and sealing potential hiding spots are effective strategies. Including regular professional inspections can also be beneficial.

Posted on

Enhancing Your Space: The Benefits of a Cape Cod Home Addition

Cape Cod home addition with beautiful attached garage and vibrant landscaping

Understanding Cape Cod Home Addition

What is a Cape Cod Home Addition?

A cape cod home addition refers to the architectural modification of a traditional Cape Cod-style home, which emphasizes expanding the living space while maintaining the historical integrity of the structure. This type of addition can include extending the footprint of the house, creating extra rooms or enhancing existing spaces, such as adding an attached garage or a sunroom. Designed to blend seamlessly with the classic Cape Cod aesthetic, home additions can provide much-needed space for growing families or modern lifestyles while preserving the home’s charm.

Benefits of Expanding Your Living Space

Expanding your living space through a Cape Cod home addition offers numerous benefits. First and foremost, it enhances your home’s functionality, accommodating families’ changing needs by providing more space for bedrooms, office areas, or entertaining. Additionally, an addition can significantly increase your property’s value, which is a critical advantage if you plan to sell in the future. By adapting your home to meet your lifestyle rather than relocating, you save on transaction fees and avoid the complexities of moving. Furthermore, a well-designed addition can improve energy efficiency if planned with modern materials and technologies.

Popular Styles of Cape Cod Home Additions

There are several popular styles to consider when planning a Cape Cod home addition. The most common includes:

  • Side Wings: Extending the house on either side maintains symmetry and enhances indoor functionality.
  • Rear Additions: Adding space to the back allows for significant room expansions without altering the front façade.
  • Second-Story Additions: Perfect for creating extra bedrooms or master suites without taking up additional ground space.
  • Porches and Sunrooms: Incorporating such areas blurs the line between indoor and outdoor living, enhancing enjoyment of the surrounding environment.

Planning Your Cape Cod Home Addition

Assessing Your Needs and Budget

Before embarking on a Cape Cod home addition, it’s vital to assess your specific needs and budget. Start by evaluating your current living situation: identify the limitations of your existing space and how an addition can address these shortfalls. For instance, are you looking for more bedrooms, a functional office, or enhanced living areas? Once you have established clear objectives, set a realistic budget that considers not just construction costs, but also variables like design fees, permits, materials, and potential landscaping. It’s advisable to allocate an additional 10-20% for unforeseen expenses that may arise during the construction process.

Choosing the Right Design and Layout

The design and layout of your addition should complement the existing structure while providing the functionality you need. Consider consulting with an architect or designer who specializes in Cape Cod homes for guidance. They can provide insights into layouts that maximize space and enhance flow. Pay attention to transitional elements, such as matching the roof pitch and windows to the existing style, ensuring visual harmony. Use 3D modeling tools or sketches to visualize how the addition will interact with the existing home and landscape.

Understanding Local Regulations and Permits

Before construction begins, you must navigate local regulations, zoning laws, and permits relevant to your Cape Cod home addition. These regulations can vary significantly by municipality, so check with your local planning department. Commonly required permits include building permits, zoning permits, and possibly environmental assessments, especially if you live near coastal areas. Familiarizing yourself with these requirements early can save you headaches later on, ensuring a smoother construction process.

Design Considerations for Cape Cod Home Addition

Incorporating Coastal Aesthetics

Incorporating coastal aesthetics into your Cape Cod home addition is essential to maintaining the architectural integrity of your home. Features like shingles, clapboard siding, and gabled roofs should be appropriately used to meld the new space with the original design. Choose a color palette that reflects the coastal atmosphere, utilizing soft hues reminiscent of sand and sea. Additionally, consider outdoor elements such as decks, patios, or landscaping that evoke the feel of seaside living, thereby enhancing the overall appeal of your addition.

Maximizing Natural Light and Views

To truly maximize the value of your Cape Cod home addition, focus on natural light and expansive views. Incorporating large windows, sliding glass doors, and skylights can create a bright, inviting space that connects you with your surroundings. Strategically position these features to capture the best views of your property, whether it be rugged coastlines, wooded areas, or landscaped gardens. Not only does this enhance the beauty and ambiance of your home, but it also contributes to a healthier living environment, reducing reliance on artificial lighting.

Textures and Materials to Use

Choosing the right textures and materials is crucial for achieving a harmonious look for your Cape Cod home addition. Use materials that reflect the coastal environment, such as weather-resistant wood, brick, or stone. Emphasize natural textures through shingles or clapboards on the exterior, ensuring they match or complement the original house. On the interior, consider utilizing hardwood floors for warmth, along with light-colored finishes and fabrics that reflect the beachy feel. Such choices can enhance both the visual appeal and longevity of your addition.

Construction Process of a Cape Cod Home Addition

Hiring the Right Professionals

Choosing the right professionals for your Cape Cod home addition is a pivotal step in the construction process. Research and shortlist contractors who specialize in home additions and have a portfolio of successful projects. Review client testimonials and consult with previous customers to gauge their satisfaction. It’s advisable to conduct interviews, ask about their experience with similar projects, and discuss timelines and pricing structures. The right team will understand your vision and be transparent about the construction process.

Stages of Construction Explained

The construction of a Cape Cod home addition unfolds in several key stages. These stages typically include:

  • Site Preparation: Clearing the site, setting up utilities, and laying the foundation.
  • Framing: Erecting walls, roofs, and structural supports.
  • Exterior Finish: Installing roofing, siding, and windows to weatherproof the structure.
  • Interior Work: Installing drywall, flooring, electrical systems, and plumbing.
  • Final Touches: Painting, installing fixtures, and landscaping the area around the addition.

Managing Your Timeline Effectively

Timelines for a Cape Cod home addition can vary widely due to many factors, including scope and weather conditions. To effectively manage your timeline, maintain open communication with your contractor and set clear expectations about project milestones. Regular check-ins can help identify any potential delays and address them proactively. Additionally, factor in time for procurement of materials, as some items may have longer lead times. Being organized and adaptable will help ensure a smooth construction process.

Maintenance and Care for Your Cape Cod Home Addition

Seasonal Maintenance Tips

Maintaining your Cape Cod home addition requires attention to seasonal tasks. In spring, inspect your roof and gutters for debris, and ensure proper drainage. Summer is a good time to check for wood rot and repaint areas showing wear. In fall, clean gutters and inspect windows for drafts, preparing your home for winter. Finally, during winter, ensure proper insulation is in place, especially if your addition has a basement or foundation exposed to cold temperatures.

Long-Term Care for Longevity

Long-term care of your Cape Cod home addition is essential to preserving its value and functionality. Schedule periodic inspections of the roof and siding, watching for signs of wear or damage. Regularly clean and maintain your landscaping to prevent pest infestations and protect your home’s foundation. Additionally, consider professional maintenance every few years to keep major systems such as HVAC and plumbing in optimal condition, which can help avoid costly repairs down the line.

When to Seek Professional Help

While some maintenance tasks are manageable for homeowners, knowing when to seek professional help is crucial. If you encounter significant structural issues, leaks, or electrical problems, contact professionals immediately. Complex tasks, such as roof repairs or foundation inspections, should also be left to qualified experts, as improperly handled issues can lead to costly repairs or safety hazards down the line.

FAQs

What permits do I need for a Cape Cod home addition?

You typically need a building permit, zoning approval, and may also need to comply with local codes for structural changes.

How much does a Cape Cod home addition cost?

Costs vary widely based on size, materials, and location, but an addition typically ranges from $100 to $300 per square foot.

Can I do a DIY Cape Cod home addition?

While DIY is possible for small projects, a professional contractor is recommended for larger expansions to ensure safety and compliance.

What styles complement a Cape Cod home addition?

Styles like Shingle, Colonial, and Contemporary are popular. Choosing a style that matches your existing structure is crucial for aesthetic unity.

How long does it take to build a Cape Cod home addition?

Timeline depends on the project’s scale and complexity, but most additions take between 3 to 6 months from planning to completion.

Posted on

Elevate Your Space with a Stunning Shower UK: Design Tips and Trends

Transform your bathroom into a luxurious space with a modern shower uk setup, featuring elegant design elements.

Understanding the Essentials of Shower UK Design

When it comes to bathroom renovations, the focus on shower uk design has never been more critical. The shower isn’t just a functional space; it’s also a design element that reflects personal style and enhances the overall ambiance. The importance of integrating style with functionality cannot be overstated, as a well-designed shower can significantly influence the experience and convenience of everyday routines.

The Importance of Style and Functionality

Style and functionality are central to shower UK design. While many homeowners prioritize aesthetics, neglecting functionality can lead to dissatisfaction and further issues down the line. A shower should be a zen-like refuge, a place to unwind from the hustle of daily life, yet it must also accommodate practicalities such as space efficiency and accessibility. Striking the right balance between these factors is essential to creating an enjoyable bathing experience.

Key Features to Consider for Your Shower UK

As you plan your shower UK, it’s vital to consider several key features to ensure that your design meets both your functional and aesthetic needs:

  • Showerheads: Options range from handheld models for flexibility to rain showerheads for a luxurious experience.
  • Water pressure: Investigate the water pressure in your home, as this affects the performance of fixtures.
  • Controls: Look for easy-to-use control pads that allow intuitive adjustments without fuss.
  • Lighting: Incorporate ambient lighting to create a soothing atmosphere while ensuring adequate brightness for practical tasks.
  • Safety features: Anti-slip flooring and grab bars cater to individuals of all ages, enhancing safety and accessibility.

Choosing the Right Materials for Your Shower UK

The materials used in your shower UK will greatly influence both its durability and design. Here’s a breakdown of suitable materials:

  • Ceramic tiles: Known for their versatility, they come in various shapes, sizes, and designs.
  • Glass panels: Perfect for modern aesthetics, they create an open and airy feel.
  • Stone: Offers a timeless look with natural textures, though it requires proper sealing to prevent water damage.
  • Fiberglass: Lightweight and easy to install, ideal for pre-fabricated showers.
  • Vinyl materials: Cost-effective and available in numerous patterns, suitable for budget-conscious renovations.

Bathroom Layout and Space Optimization

Maximizing space and optimizing your bathroom’s layout are integral to achieving a stunning shower UK design. Understanding the dimensions of your bathroom and how to best utilize them can lead to a more functional and aesthetically pleasing space.

Maximizing Space in Small Bathrooms

Small bathrooms present unique challenges, but with smart design choices, they can feel larger and more open. Here are some strategies:

  • Embrace corner shower units to utilize typically wasted space efficiently.
  • Consider installing a sliding door rather than a swing door to enhance accessibility.
  • Use clear glass to give the illusion of space, keeping the area light and airy.
  • Incorporate built-in shelving or recessed niches for delicate shampoo and soap organization.

Design Layouts: Walk-in vs. Enclosed Shower UK

The choice between a walk-in and enclosed shower UK is pivotal in your design process. Walk-in showers create a seamless look and accessibility, while enclosed showers can provide privacy and limit splashes, depending on your needs and preferences. Evaluate the following to guide your decision:

  • Space available: Walk-in designs thrive in larger bathrooms, while enclosed showers suit smaller spaces.
  • Aesthetic preferences: Walk-in designs offer a modern flair, while enclosed showers can fit traditional decor well.
  • Water containment: Enclosed showers ensure better control of water flow, minimizing excess pooling outside the shower.

Incorporating Storage Solutions in Your Shower UK

Storage solutions within or adjacent to your shower UK can help you maintain an organized space. Consider these practical ideas:

  • Built-in shelves or cubbies within the wall can house toiletries without cluttering the space.
  • Over-the-door or wall-mounted racks efficiently store bath essentials.
  • Use shower caddies or hanging organizers designed specifically for compact storage on shower rods.

Shower UK Trends: What’s Hot in 2023

With each year, design trends evolve, and the world of shower UK is no exception. Staying abreast of the latest innovations and styles can help inspire your renovation project.

Popular Styles and Innovations in Fixtures

This year, we are witnessing an emergence of significant trends within shower fixtures. Features like overhead rain showerheads, digital controls for precise temperature adjustments, and multi-function shower systems are gaining popularity. Unique fixtures, such as hexagonal showerheads and artistic sprayers, also showcase personalization.

Eco-Friendly Options for Your Shower UK

Environmental awareness continues to shape shower UK design trends. Low-flow showerheads and water-efficient appliances are critical to reducing water consumption without sacrificing the showering experience. Additionally, look for brands that incorporate sustainable materials to further decrease your bathroom’s ecological footprint.

Color Trends and Design Inspirations

Color plays a vital role in setting the mood for your shower UK. Popular shades this year include soft pastels for a calming effect and bold hues for a statement look. Textured tiles and matte finishes are also trending, providing depth and a contemporary touch.

Maintenance Tips for a Long-Lasting Shower UK

An often-overlooked aspect of shower UK design is the importance of long-term maintenance. Regular care not only enhances aesthetic appeal but also prolongs the life of your shower.

Essential Cleaning Practices to Follow

Establish a routine cleaning schedule to prevent mold and mildew buildup. Use non-abrasive cleaners and tools specifically tailored for your shower’s materials, and rinse thoroughly to eliminate residue.

Common Issues and How to Fix Them

Regular maintenance can prevent common issues such as leaks and drainage problems. Keep an eye on grout lines for cracks, and re-seal regularly. Ensure that the drain is clear of debris to promote proper water flow.

Maintaining the Freshness of Your Shower UK

To maintain a fresh atmosphere, consider using natural deodorizers or placing potted plants that thrive in humid conditions. Open windows or use exhaust fans to reduce moisture that can lead to odors and mildew.

Frequently Asked Questions About Shower UK

What are the benefits of a rainfall showerhead?

Rainfall showerheads provide a soothing, spa-like experience with gentle water flow, mimicking natural rain. They enhance relaxation and are ideal for stress relief.

How do I choose the right size for my shower?

The right size depends on your bathroom dimensions and personal preferences. A general rule is to allow at least 36 inches in width for comfort and maneuverability.

Are walk-in showers a good investment?

Walk-in showers enhance accessibility and can increase home value. They embody modern aesthetics, leading to positive buyer interest if you consider selling.

What materials are best for shower walls?

Ceramic tiles, natural stone, and acrylic panels are top choices for durability and water resistance. Select based on aesthetics, maintenance needs, and budget considerations.

How can I ensure my shower is eco-friendly?

Opt for low-flow fixtures, eco-friendly materials, and consider gray water systems to minimize water waste. Regular maintenance also supports sustainable use.

Posted on

Enhancing Your Space with Elegant Showers Australia for Luxurious Bathrooms

Experience elegance with stylish showers in Australia featuring modern designs and serene atmospheres.

Understanding Elegant Showers Australia

In the realm of bathroom renovations, elegant showers Australia stands as a synonym for luxury, comfort, and innovative design. The way we experience daily routines like showering is rapidly evolving, highlighting the importance of incorporating stylish fixtures that elevate not only personal comfort but also the overall aesthetics of the bathroom.

What Defines Elegant Showers?

Elegant showers transcend merely functional aspects; they encapsulate a transformative experience. Defined by sleek designs, high-quality materials, and advanced technology, these showers are engineered to deliver an immersive experience. They exhibit a balance between style and utility, where visual appeal meets outstanding performance. Imagine stepping into a shower that mimics the sensation of natural rainfall or envelops you in soothing steam—this is the hallmark of elegant showers.

The Benefits of Elegant Showers Australia

Choosing elegant showers contributes to a myriad of benefits. They enhance the aesthetic charm of your bathroom, creating a serene retreat within your home. These showers often come equipped with features that promote hydrotherapy, relaxation, and rejuvenation, addressing both physical and mental well-being. Moreover, investing in luxurious fixtures can increase the overall property value, making elegant showers a smart choice from a financial perspective. Their modern designs cater to diverse tastes, ensuring a personalized fit for any home.

Choosing the Right Style for Your Bathroom

Selecting the appropriate style for your elegant shower can significantly influence your bathroom’s ambiance. It’s crucial to consider the existing decor and your personal taste. For instance, minimalist designs may suit contemporary spaces, while ornate models may enhance traditional interiors. The key is to harmonize functionality with your aesthetic vision, ensuring that your shower is not just a fixture, but a centerpiece of your bathroom.

Types of Elegant Showers Australia

Exploring the diverse types of elegant showers available will help you identify the ideal match for your needs. Each type offers unique features and benefits, enriching your bathing experience.

Rainfall Showers: The Ultimate Experience

Rainfall showers provide the experience of bathing under a gentle cascade of water, enhancing relaxation. The broad head design mimics natural rain, allowing water to envelop the body. The soothing sensation can transform a mundane daily habit into a spa-like experience, offering relief from stress. Integrated features like adjustable settings allow users to switch between rainfall and concentrated streams, providing versatility.

Steam Showers for Relaxation

Looking for a serene escape? Steam showers create a humid environment that promotes relaxation. These environments help detoxify the body, soothe sore muscles, and improve circulation. Some models provide aromatherapy options, integrating essential oils into the steam for a truly immersive experience. Ideal for individuals seeking to enhance their wellness routines, steam showers combine luxury with health benefits.

Handheld Showers: Versatility in Design

Handheld showers bring a level of versatility and convenience to bathing. With the ability to direct water flow wherever needed, they are perfect for all members of the household. From cleaning to optimal rinsing, handheld options accommodate various user preferences and needs. Many models also feature adjustable settings and water-saving designs, making them eco-friendly choices without compromising on style.

Installation and Maintenance

Installing and maintaining an elegant shower requires proper planning and knowledge to ensure long-lasting performance and aesthetic appeal.

Preparing Your Bathroom for Elegant Showers Australia

Before installation, assessing your bathroom’s layout is essential. Consider plumbing requirements, space constraints, and existing decor. Proper waterproofing and drainage systems should also be in place to accommodate your new shower. Engaging professionals in the planning phases can prevent costly remodels and ensure a seamless installation process.

Essential Tools and Materials for Installation

The right tools and materials are crucial for a successful installation. Basic tools include tile cutters, wrenches, and screwdrivers, along with essential plumbing supplies. High-quality materials, including waterproof backer boards and durable tiles, enhance the longevity of your installation. Don’t hesitate to consult with professionals about the best products suited for your specific shower type.

Maintenance Tips for Longevity

Routine maintenance is key to preserving the elegance and functionality of your shower. Regularly inspect for leaks and replace worn-out components promptly to avoid water damage. Utilize appropriate cleaning agents that prevent mineral buildup while retaining the integrity of surfaces. Establishing a regular cleaning schedule can keep your elegant shower looking pristine and operating effectively.

Design Inspiration for Elegant Showers Australia

Designing an elegant shower is an opportunity to express personal style while optimizing space. Within this section, we explore various inspirations that can guide you toward creating the perfect shower.

Modern vs. Traditional Styles

Understanding the distinction between modern and traditional styles can aid in your design process. Modern designs often incorporate sleek lines, metallic finishes, and minimalist features that emphasize simplicity. Conversely, traditional styles embrace intricate details, such as ornate patterns and classic materials, bringing warmth and character. The choice ultimately depends on personal preference, existing home decor, and the intended atmosphere of the bathroom.

Incorporating Smart Features

Smart showers represent a significant leap in shower design, integrating technology to enhance user experience. Features like temperature control, automatic shut-off, and even voice activation make for an advanced bathing experience. This technology can offer personalized settings that cater to individual comfort preferences, promoting sustainable water consumption without sacrificing luxury.

Color Schemes and Textures

Thoughtfully chosen color schemes and textures can further emphasize the elegance of your shower space. Neutral tones, like whites and grays, allow for versatility and can be accented with bright tiles or metallics for a striking contrast. Textured surfaces, such as natural stone or unique tiles, add depth, inviting touch and interest. Coordinate these design elements to create a cohesive and luxurious aesthetic throughout the bathroom.

Frequently Asked Questions (FAQs)

What are the advantages of elegant showers Australia?

Elegant showers Australia enhance aesthetics, provide comfortable experiences, and may increase property value, blending style with functionality.

How can I choose the right shower type?

Consider your bathroom space, style preferences, and water pressure to select the ideal elegant shower type, ensuring a perfect match for your needs.

Are elegant showers easy to maintain?

Yes, maintaining elegant showers requires regular cleaning and minor upkeep to ensure that they remain stunning and in top condition for years.

What trends are popular in shower design?

Trending designs include sleek finishes, eco-friendly water-saving features, and wellness-oriented designs that prioritize relaxation and comfort.

How do I ensure proper installation?

Hiring professionals for installation is recommended to avoid plumbing issues and ensure a safe, effective outcome for your elegant shower project.

Posted on

Elegant Home and Garden Ideas for Inspired Living Spaces

Home and Garden

Essential Home Maintenance Tips

Homeownership comes with its fair share of responsibilities, and regular maintenance is crucial to ensure your home remains a safe, functional, and welcoming space. From seasonal tasks to knowing how to tackle common repairs, being proactive can save homeowners time and money in the long run. Below are essential home maintenance tips that every homeowner should consider.

Seasonal Home Maintenance Checklist

Maintaining your home is an ongoing process that can differ significantly from season to season. By creating a seasonal maintenance checklist, you can stay on top of necessary tasks and avoid more significant repairs down the line. Here’s a breakdown of essential tasks for each season:

  • Spring:
    • Inspect the roof for any damage and clean gutters to prevent water damage.
    • Check for signs of pests and treat your home accordingly.
    • Service your HVAC system to ensure it’s ready for warmer months.
  • Summer:
    • Inspect and clean outdoor furniture and grills.
    • Check the irrigation system and adjust for watering needs.
    • Inspect decks and patios for wear and perform necessary repairs.
  • Fall:
    • Clean gutters and downspouts to prepare for winter.
    • Check windows and doors for any drafts and weatherproof as needed.
    • Inspect and service your heating system in preparation for colder weather.
  • Winter:
    • Inspect insulation in attics and basements to ensure energy efficiency.
    • Check for ice dams on your roof and remove snow buildup.
    • Test smoke and carbon monoxide detectors.

Common Repairs Every Homeowner Should Know

Understanding how to handle common repairs can empower homeowners and save on repair costs. Here are several essential repairs you should be familiar with:

  • Fixing Leaky Faucets: Most leaks can be fixed by replacing washers or O-rings. Start by turning off the water supply, disassembling the faucet, and replacing the worn parts.
  • Patch Small Holes in Walls: Use spackling paste for small holes. Apply it with a putty knife, let it dry, and then sand it smooth before repainting.
  • Unclogging Drains: A plunger can often clear minor clogs. For more stubborn blockages, a plumbing snake or a mixture of baking soda and vinegar can be effective.
  • Replacing Light Fixtures: Always turn off the power before replacing fixtures. Unscrew the old fixture and follow the manufacturer’s instructions for installation.

Tools Every Homeowner Should Have in Their Toolkit

Having the right tools on hand can make home repairs and maintenance much simpler. Here’s a list of essential tools every homeowner should have:

  • Basic Hand Tools: A hammer, screwdriver set, pliers, and adjustable wrench are essential for most repairs.
  • Measuring Tools: A tape measure and level are crucial for accurate measurements and ensuring items are hung straight.
  • Power Tools: A cordless drill and circular saw can expedite many projects, from assembling furniture to building shelves.
  • Safety Gear: Always wear safety goggles and gloves when performing repairs to protect against injuries.

Gardening Basics for Beginners

Gardening can be an incredibly rewarding hobby, providing not just beautiful landscapes but also fresh produce and herbs. For beginners, understanding the basics is crucial for a successful gardening experience. Here are fundamental principles every novice gardener should know.

Choosing the Right Plants for Your Climate

Understanding your local climate is essential in selecting plants that will thrive in your garden. Here are some tips for choosing the right plants:

  • Know Your USDA Plant Hardiness Zone: This zone indicates which plants are likely to survive and thrive in your area based on average winter temperatures.
  • Consider Sunlight Requirements: Some plants require full sun, while others thrive in partial shade. Assess the sunlight availability in your garden before selecting plants.
  • Native Plants: Consider incorporating native plants, as they are adapted to your local climate, require less maintenance, and support local wildlife.

Soil Preparation and Fertilization Techniques

Soil health is fundamental to successful gardening. Here are steps to prepare your soil and fertilize effectively:

  1. Test Your Soil: Use a soil testing kit to determine pH levels and nutrient content. This will guide your amendments.
  2. Amend Your Soil: Based on test results, add organic matter such as compost to improve soil structure and fertility.
  3. Fertilization: Use slow-release fertilizers or organic options like fish emulsion to nourish your plants throughout the growing season.

Watering and Irrigation Best Practices

Proper watering is crucial for plant health. Here are best practices to ensure your garden receives adequate moisture:

  • Deep Watering: Water deeply but less frequently to encourage deep root growth. Aim for about 1 inch of water per week, depending on rainfall.
  • Morning Watering: Watering in the morning minimizes evaporation and fungal diseases, allowing plants to absorb moisture effectively.
  • Drip Irrigation: Consider installing drip irrigation systems for efficient water delivery directly to the plant roots, conserving water and reducing weed growth.

Interior Design and Decor Strategies

Creating a beautiful and functional home involves thoughtful interior design and decor. Here are strategies to enhance your living space.

Color Theory: Choosing the Right Palette for Your Home

Color plays a pivotal role in setting the mood of a room. Understanding color theory can help you choose the right palette:

  • Warm Colors: Reds, oranges, and yellows create an energetic atmosphere and are suitable for social spaces.
  • Cool Colors: Blues, greens, and purples promote tranquility, making them ideal for bedrooms and relaxation areas.
  • Neutral Colors: Whites, grays, and browns serve as a versatile background, allowing you to incorporate accents and textures.

Maximizing Space: Furniture Arrangement Tips

Effective furniture arrangement can enhance both functionality and aesthetics in your home:

  • Define Areas: Use rugs to define different areas within an open space, creating a sense of order.
  • Flow and Accessibility: Ensure furniture placement allows for easy movement throughout the space. Aim for at least 18 inches of walking space between pieces.
  • Scale and Proportion: Choose furniture that fits the scale of the room. Overly large furniture can make a space feel cramped.

Incorporating Personal Touches in Home Decor

Your home should reflect your personality and style. Here are ways to incorporate personal touches:

  • Artwork: Display personal photography or artwork that resonates with you and complements your decor style.
  • Sentimental Items: Incorporate heirlooms or gifts from loved ones to create a meaningful atmosphere.
  • Color Accents: Use throw pillows, blankets, or decor items in your chosen color palette to add character to your space.

Advanced Gardening Techniques

Once you’ve mastered the basics, you may want to explore advanced gardening techniques to enhance your gardening skills and yield. Here are some recommended practices:

Organic Gardening: Principles and Benefits

Organic gardening focuses on sustainable practices that enhance the health of the ecosystem. Here are principles and benefits:

  • No Synthetic Chemicals: Avoid synthetic fertilizers and pesticides, opting for natural alternatives to protect the environment and your health.
  • Biodiversity: Incorporate a variety of plants to foster a balanced ecosystem, which can help deter pests naturally.
  • Soil Health: Emphasize composting, crop rotation, and cover cropping to maintain soil vitality and fertility.

Companion Planting for Pest Management

Companion planting involves grouping plants that benefit each other, particularly in pest management:

  • Tomato and Basil: Basil can repel tomato hornworms while enhancing the flavor of tomatoes.
  • Marigolds: Planting marigolds can deter nematodes and attract beneficial insects.
  • Cabbage and Dill: Dill can attract beneficial wasps that prey on cabbage pests.

Creating a Sustainable Garden Ecosystem

Creating a sustainable garden ecosystem involves fostering a balanced environment that supports both plants and wildlife:

  • Plant Diversity: Incorporate a mix of flowers, shrubs, and trees to attract pollinators and beneficial insects.
  • Water Conservation: Utilize rain barrels to collect rainwater for irrigation, reducing reliance on municipal water systems.
  • Mulching: Apply organic mulch to conserve moisture in the soil, suppress weeds, and improve soil health as it decomposes.

Outdoor Living Spaces: Enhancing Your Garden

Outdoor living spaces can significantly extend your home’s usable area, providing a relaxing environment for gatherings and personal retreat. Here are tips for enhancing your garden space.

Designing Functional Outdoor Areas for Relaxation

Creating a functional outdoor area involves thoughtful planning and design:

  • Seating Arrangements: Choose comfortable, weather-resistant furniture to encourage relaxation and socialization.
  • Shade Solutions: Incorporate umbrellas, pergolas, or shade sails to provide respite from the sun.
  • Outdoor Rugs: Use outdoor rugs to delineate spaces and add warmth and comfort to your outdoor areas.

Incorporating Water Features and Lighting

Water features and lighting can enhance the ambiance of your outdoor space:

  • Fountains and Ponds: Water features can create a calming atmosphere while attracting wildlife such as birds and butterflies.
  • Outdoor Lighting: Use solar lights, string lights, or lanterns to create a cozy ambiance for evening gatherings.
  • Pathway Lighting: Illuminate pathways with low-voltage lighting to enhance safety and aesthetics.

Building a Sustainable Landscape with Native Plants

Incorporating native plants into your landscape design can promote biodiversity and sustainability:

  • Low Maintenance: Native plants are adapted to local conditions, requiring less water and maintenance than non-native species.
  • Wildlife Habitat: Native plants provide habitat and food for local wildlife, including birds, butterflies, and beneficial insects.
  • Soil Conservation: Native plants help prevent soil erosion and improve soil health through their root systems.
Posted on

Revolutionary Outdoor Living Configurator: Design Your Ideal Backyard in 2026

Enjoying an outdoor living configurator setup with a family grilling and playing in a beautifully landscaped backyard.

Understanding Outdoor Living Configurators

Creating an inviting and functional outdoor living space has become increasingly important for homeowners looking to maximize their enjoyment of both indoor and outdoor areas. An outdoor living configurator serves as a powerful tool that allows users to visualize and design their dream outdoor environments with ease. This article will delve into the purpose, benefits, and essential features of outdoor living configurators, equipping you with the insights needed to transform your outdoor areas.

What is an Outdoor Living Configurator?

An outdoor living configurator is a digital tool designed to help homeowners and landscape enthusiasts visualize and customize outdoor spaces. These configurators typically feature user-friendly interfaces that allow users to select various elements, such as furniture, plants, layouts, and materials, making it easier to create a cohesive design that reflects personal tastes and lifestyle needs. Think of it as a virtual design assistant that guides you through the process of planning and styling your outdoor areas.

Benefits of Using a Configurator for Your Outdoor Space

  • Interactive Design Experience: Users can experiment with different layouts and themes in real-time, allowing for greater creativity without the fear of making mistakes.
  • Personalization: Customization options enable homeowners to tailor their outdoor spaces to their unique preferences and needs, ensuring that the final design aligns with their vision.
  • Cost-Effective Planning: Investing time in a configurator can help you avoid costly errors during the actual implementation of your outdoor projects, saving money and time in the long run.
  • Visualization: These tools can provide 3D renderings and visual outputs, enabling users to see how materials, colors, and items will interact in the real world.

Key Features to Look For

When selecting an outdoor living configurator, here are some critical features to consider:

  • User-Friendly Interface: A straightforward and intuitive design can enhance your experience and make the planning process more enjoyable.
  • Wide Range of Options: Look for configurators that offer a variety of furniture, plants, materials, and accessories to truly personalize your experience.
  • 3D Visualization: The ability to see a three-dimensional representation of your planned space can greatly improve your understanding of how elements will work together.
  • Compatibility with Real Landscapes: Some configurators integrate with satellite imagery or maps to help you design your outdoor space to fit within your existing landscape.
  • Budget Estimation Tools: Features that help estimate costs associated with different design choices can assist in managing your budget effectively.

Planning Your Dream Outdoor Space

Creating the perfect outdoor area requires careful planning and consideration of various elements. Knowing how to navigate your needs and preferences is crucial for a successful outcome. Here’s a breakdown of the essential steps to consider when planning your outdoor living space.

Assessing Your Needs and Preferences

Before diving into design, it’s vital to assess your specific needs. Consider what you want from your outdoor space. Do you wish to host gatherings, create a serene retreat, or cultivate a garden? Identifying your primary goals will guide your design decisions and help ensure that the final outcome meets your expectations.

Common Challenges in Outdoor Space Design

Outdoor space design can present various challenges, such as:

  • Space Limitations: Small yards can restrict options, making it essential to maximize every square foot creatively.
  • Climate Considerations: Depending on your location, some plants or materials may be more suitable than others due to weather conditions.
  • Maintenance Requirements: Consider the long-term upkeep of your design to ensure it remains enjoyable and manageable.

Step-by-Step Guide to Using a Configurator

Using a configurator can streamline the design process. Here’s a simple guide to get you started:

  1. Choose Your Base Layout: Start by selecting a base layout that matches your outdoor space’s dimensions.
  2. Select Key Features: Add significant elements such as seating, tables, or BBQ stations that are essential for your envisioned space.
  3. Customize Finishing Touches: Incorporate décor items, plants, and lighting fixtures to personalize your design and bring it to life.
  4. Review and Adjust: Make sure to review the design from different angles and adjust elements as necessary to achieve balance and aesthetic appeal.
  5. Save and Share Your Design: Once satisfied, save your design and consider sharing it with friends or professional landscapers for feedback.

Popular Outdoor Design Trends for 2026

As we look towards the future, several trends are shaping outdoor living spaces. Understanding these trends can help you create a contemporary and stylish environment.

Innovative Materials and Sustainability

Increasingly, homeowners are gravitating towards sustainable materials that minimize environmental impact. Eco-friendly options such as recycled composites for decking or sustainably sourced timber are becoming standard in outdoor design. Additionally, innovative materials like permeable concrete allow for better water drainage, making them ideal for environmentally conscious consumers.

Incorporating Smart Technology into Outdoor Designs

Smart technology is not just for interior spaces. Many new outdoor living designs feature smart outdoor lighting, automated irrigation systems, and weather-resistant audio systems. These technologies enhance convenience and can improve the overall outdoor experience.

Creating Multifunctional Spaces

Outdoor areas are being designed for versatility, allowing them to serve multiple functions. Whether it’s creating spaces for relaxation, entertainment, or gardening, modern designs often integrate flexible furnishings and modular elements that can adapt to various activities.

Real-Life Examples of Successful Designs

Illustrating the success of outdoor living configurators, we can look at a few standout designs that exemplify creativity and functionality.

Case Study: Transforming a Small Backyard

In one instance, a couple faced the challenge of a compact urban backyard. Utilizing a configurator, they designed a space that included vertical gardens, a small dining area, and a dedicated relaxation zone. By choosing multifunctional furniture and vertical elements, they maximized their small footprint while enhancing the aesthetic appeal.

Highlighting Unique Outdoor Living Spaces from Around the World

From Mediterranean-style terraces to contemporary rooftop gardens, global outdoor designs offer inspiration. For instance, a stunning Bali-inspired outdoor space featuring a pool and lush greenery provides an oasis-like retreat, while leveraging local materials embodies the surrounding culture.

Lessons Learned from Professional Designers

Insights from professional landscape designers emphasize adaptability and context. Successful outdoor projects often reflect the surrounding environment and make use of natural features. The key takeaway is to embrace what your space offers while infusing your personal style into the design.

Future of Outdoor Living Configurators

As technology evolves, the prospects for outdoor living configurators continue to expand. Keeping an eye on advancements will help users make informed design decisions. Here are a few anticipated trends.

Emerging Trends and Features to Watch in 2026

Future configurators may integrate augmented reality (AR) capabilities, allowing users to visualize their designs in real-time as they navigate their physical spaces. Additionally, enhanced AI-driven suggestions could tailor design choices based on individual style preferences and past projects.

How to Stay Updated on Innovations

Staying informed on the latest trends and tools can enhance your outdoor experience. Following industry blogs, participating in online forums, and subscribing to design newsletters will provide the latest insights into outdoor living and configurator developments.

Final Thoughts on Enhancing Your Outdoor Living Experience

Embracing the use of an outdoor living configurator not only simplifies the design process but also enriches your outdoor lifestyle. By understanding the tools available and current design trends, you can create a space that reflects your unique personality and meets your functional needs, paving the way for joyful outdoor experiences for years to come.

What are the best outdoor living configurators available?

Many configurators offer unique features tailored to different needs. Researching options and reading user reviews can help you find one that suits your preferences.

How can an outdoor living configurator help with space planning?

These tools simplify the planning process by allowing you to visualize layouts and test the viability of different elements based on your specific outdoor area.

What design elements should I consider for my outdoor space?

When designing an outdoor space, consider seating arrangements, plant placements, pathways, lighting, and decorative features that create a cohesive look while catering to practical needs.

Are outdoor living configurators suitable for DIY projects?

Absolutely! Many outdoor living configurators are designed with DIY enthusiasts in mind, providing the guidance and tools needed to bring your vision to life without professional assistance.

How do outdoor living configurators compare in cost?

While many configurators are available for free or through a subscription model, costs can vary based on features and functionality. It’s wise to compare options and select one that aligns with your budget and needs.

Posted on

Enhancing Your Home with Stylish Island Lighting Solutions

Bright island lighting accentuates a modern kitchen's elegance and warmth.

Understanding Island Lighting

What is Island Lighting?

Island lighting refers to the illumination fixtures specifically designed for use over kitchen islands, breakfast bars, or similar areas within a home. These fixtures not only serve a practical purpose by providing necessary light for cooking and dining but also contribute to the aesthetic appeal of a space. In contrast to general ambient lighting, island lighting provides focused lighting that enhances visibility and creates a welcoming atmosphere. Opting for the right island lighting solution can elevate the overall design of a kitchen, combining function with style.

Importance of Proper Lighting

Proper lighting is essential in any space, and when it comes to kitchens, it becomes even more critical. The kitchen is often considered the heart of the home, a place where families gather, meals are prepared, and memories are made. Adequate lighting over an island not only ensures safety by illuminating work surfaces but also sets the mood for gatherings. It can transform a dull space into a vibrant culinary hub. Moreover, well-planned island lighting can highlight design features, such as custom cabinetry or decorative backsplash tiles, making the kitchen feel more inviting and stylish.

Types of Island Lighting Fixtures

There is a wide variety of fixtures suitable for island lighting, each with different styles and functionalities. Here are some popular types:

  • Pendant Lights: These hanging fixtures are a popular choice for island lighting due to their versatility and ability to provide direct light over narrow spaces. They come in various designs, from minimalist to ornate.
  • Chandeliers: For a touch of elegance, chandeliers can add a sophisticated flair to an island, making them a focal point in the kitchen.
  • Track Lighting: This type allows you to direct light where it’s needed most. Track lights can be adjusted to illuminate specific areas of the island or surrounding surfaces.
  • Flush Mounts: Ideal for lower ceilings, flush mount fixtures provide general illumination and can be combined with other fixtures to enhance the light distribution.

Best Practices for Island Lighting Design

Layering Light for Functionality

Layering different types of lighting is a key principle in design, especially with island lighting. A combination of ambient, task, and accent lighting creates a dynamic and functional environment. Ambient lighting fills the room with general illumination, while task lighting provides focused light where it’s needed, such as over the kitchen island. Accent lighting can highlight architectural features or décor. This holistic approach ensures versatility, allowing the space to adapt to various activities, from cooking to entertaining.

Selecting the Right Fixture Style

Choosing the appropriate style of fixture is crucial for complementing the overall design of your kitchen. Consider elements such as the color scheme, cabinetry, and countertops. Industrial-style fixtures work well in modern spaces, while classic pendant lights fit traditional designs. Moreover, combining multiple styles can create an eclectic look that reflects personal taste. Aim for a cohesive aesthetic that enhances the beauty of the kitchen while performing effectively.

Positioning Your Lights Effectively

Proper positioning of lighting fixtures can dramatically affect the overall light distribution. For pendants, ensure they hang approximately 30-36 inches above the countertop to avoid obstruction while providing adequate illumination. If using multiple fixtures, maintain equal spacing between them to create a balanced look. Additionally, consider the line of sight; fixtures should not block views or create glare. Thoughtful placement is key to achieving practical yet visually appealing island lighting.

Choosing Materials and Finishes

Popular Materials in Island Lighting

The material used in lighting fixtures can influence both functionality and style. Among the popular materials are:

  • Glass: Often used for shades in pendant lights, glass allows for light diffusion while adding a touch of sophistication.
  • Metal: Fixtures made from materials like brushed nickel, brass, or copper can bring an industrial or vintage edge to the island.
  • Wood: Wood fixtures provide warmth and can introduce organic elements, complementing modern minimalist kitchens.
  • Fabric: Soft shades can soften the light and add a decorative touch, ideal for creating a cozy ambiance.

Combining Colors and Textures

Colors and textures play a significant role in defining the aesthetic appeal of island lighting. Warm tones, like gold or brass, can create a cozy atmosphere, while cool tones, such as silver or polished chrome, can evoke a clean and modern feel. Additionally, mixing textures, like rough wood with sleek metal, adds depth and interest to the design. Creating contrast can enhance the overall visual appeal and make the island a standout feature in the kitchen.

Durability and Maintenance Considerations

Selecting durable materials is critical for the longevity of island lighting fixtures, particularly in environments prone to moisture and grease, like kitchens. Opt for materials that are easy to clean and resistant to tarnishing or corrosion. With regular maintenance, such as cleaning glass shades and checking electrical components, you can ensure that your island lighting remains both functional and stylish for years to come.

Innovative Technology in Island Lighting

Smart Lighting Options

Smart home technology is becoming increasingly popular in lighting design, including island lighting. Smart bulbs or fixtures can be controlled from smartphones or smart home systems, allowing users to adjust brightness, color temperature, and power settings remotely. This level of control not only enhances convenience but can also contribute to energy savings.

Energy-Efficient Solutions

In today’s environmentally-conscious world, energy-efficient lighting options, such as LED fixtures, are becoming standard. LED lights consume significantly less energy compared to traditional incandescent bulbs, while offering longer lifespans. When selecting island lighting, consider whether the fixtures are compatible with LED bulbs or are available in energy-efficient designs, promoting sustainability without compromising on aesthetics.

Trends in Island Lighting Technology

Staying updated with trends can inspire innovative island lighting designs. Current trends include the use of customizable lighting colors and intensities, integration with voice-activated systems, and the rising popularity of linear lighting fixtures that provide a modern touch. Additionally, there’s a growing trend towards sustainability, with fixtures designed with recyclable materials or energy-efficient components. Keeping an eye on these trends can help you select solutions that are not only stylish but also ahead of the curve.

Transforming Your Space with Island Lighting

Case Studies of Successful Installations

Examining successful installations can provide insight into effective island lighting design. For instance, a modern farmhouse kitchen featuring oversized pendant lights creates a stunning focal point while providing task lighting for meal preparation. In contrast, a minimalist kitchen may utilize sleek, integrated LED lighting within cabinetry to keep the space uncluttered while effectively illuminating the island. Conducting a thorough analysis of these cases helps in understanding how different styles and approaches can be adapted to suit a variety of kitchen designs.

Common Mistakes to Avoid

When designing island lighting, several common mistakes should be avoided to optimize both aesthetics and functionality. These include:

  • Choosing fixtures that are too small, which can make the island feel disproportionate.
  • Neglecting the type of light bulb; always opt for those that provide adequate brightness without overwhelming glare.
  • Failing to consider the entire lighting scheme in the kitchen, which may lead to poor light balance.

A critical review of design choices with a focus on these potential pitfalls can ensure a well-executed island lighting design.

FAQs and Expert Answers

1. What is the ideal height for island lighting fixtures?

The recommended height for pendants over an island is 30-36 inches above the countertop to ensure optimal lighting without interfering with sight lines.

2. Can I mix different styles of island lighting fixtures?

Yes, mixing styles can create an eclectic look, but it’s crucial to maintain a cohesive color palette and overall aesthetic for harmony in design.

3. How many fixtures do I need over my kitchen island?

The number of fixtures depends on the size of the island and the desired brightness. Generally, 2-3 pendants work well for typical-sized islands.

4. What type of light bulb is best for island lighting?

LED bulbs are recommended for their energy efficiency and longer lifespan. Choosing bulbs with adjustable brightness can enhance functionality.

5. How do I maintain my island lighting fixtures?

Regular maintenance includes cleaning glass shades, checking bulbs for functionality, and ensuring all electrical components are in good condition for safety.