
Understanding Vapor Barrier Installation
What is a Vapor Barrier?
A vapor barrier is a material designed to prevent moisture from penetrating through walls, floors, or ceilings. Commonly used in homes, especially in areas like crawl spaces and basements, it acts as a shield to mitigate the risks of mold, mildew, and structural damage caused by excess moisture. By creating a moisture-resistant layer, vapor barriers help maintain better environmental conditions within living spaces.
Importance of Vapor Barrier Installation
The installation of a vapor barrier is crucial for various reasons. Firstly, it helps to control humidity levels, protecting the interior of a home from moisture damage. High humidity can lead to the growth of mold and mildew, which not only pose health risks but also can result in costly repairs. Additionally, a vapor barrier enhances the energy efficiency of a home by preventing moisture from escaping into the air, leading to lower heating and cooling costs. Overall, proper Vapor Barrier Installation is essential for maintaining a safe, healthy, and energy-efficient home environment.
Common Materials Used
Vapor barriers can be made from several types of materials, with polyethylene sheeting being the most common. This plastic material is preferred due to its durability, moisture resistance, and availability in various thicknesses, typically ranging from 6 to 20 mil. Other materials include specialty membranes and foil-backed options, each catering to specific moisture prevention needs. Understanding the material properties ensures effective performance in different crawl space or basement conditions.
Preparing for Vapor Barrier Installation
Required Tools and Equipment
Preparation is key to a successful vapor barrier installation. Essential tools include utility knives for cutting the barrier, measuring tape for precise measurements, a stapler or adhesive for securing the barrier, and safety gear such as gloves and masks to protect against dust and potential contaminants. Having the right equipment on hand streamlines the process and enhances safety during installation.
Assessing the Crawl Space Condition
Before installation, a thorough assessment of the crawl space is necessary. Check for existing moisture issues, signs of mold, or structural damage. Ensure the area is free from debris, standing water, and any obstacles that may impede the installation. If moisture levels are high, it may be beneficial to install a dehumidifier or drainage system before placing the vapor barrier, ensuring a dry environment for optimal performance.
Choosing the Right Type of Vapor Barrier
Different projects may require specific types or thicknesses of vapor barriers. When selecting a vapor barrier, consider factors such as the level of moisture in the crawl space, the potential for groundwater intrusion, and local climate conditions. Thicker barriers are generally more effective in high-moisture environments, while lighter options might suffice in drier climates. Your choice will determine the longevity and effectiveness of your installation.
Step-by-Step Vapor Barrier Installation Process
Clearing the Crawl Space
Start by thoroughly clearing the crawl space of any debris, old insulation, or other hazards. This step is crucial in ensuring that the vapor barrier lies flat and adheres properly to the ground and walls. It is important to create a clean, dry surface, as any debris can compromise the barrier’s ability to keep moisture at bay.
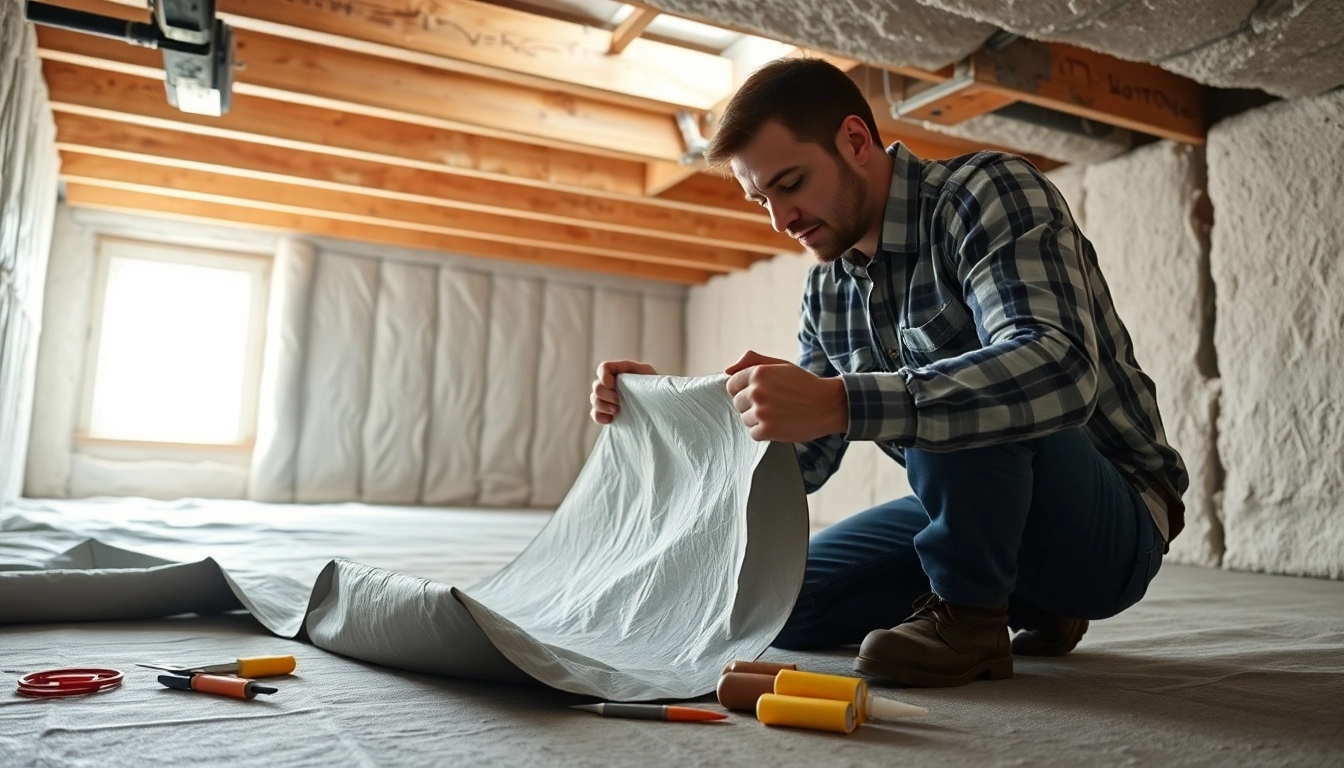
Measuring and Cutting the Barrier
After preparing the area, the next step is to measure the crawl space’s dimensions accurately. Use the measuring tape to find measurements for length and width, allowing for excess material at the edges to ensure full coverage. Cut the polyethylene sheeting to size using a sharp utility knife, taking care to avoid any tears that could compromise the integrity of the vapor barrier.
Securing the Barrier in Place
With the vapor barrier cut to size, lay it down in the crawl space, overlapping seams by at least 12 inches to ensure a proper seal. Secure the barrier using a stapler or adhesive, ensuring the edges adhere tightly against the walls. It’s important to seal any seams and penetrations thoroughly to keep moisture from infiltrating through gaps. Utilize duct tape on seams for additional security, creating an airtight barrier against ground moisture.
Common Challenges in Vapor Barrier Installation
Dealing with Moisture Issues
One of the primary challenges faced during vapor barrier installation is existing moisture problems. If the crawl space has a history of flooding or high humidity, it may require additional remediation before installing the vapor barrier. Addressing drainage solutions or using a sump pump can prevent leaks that undermine the vapor barrier’s effectiveness.
Ensuring Proper Sealing
Proper sealing is vital for the success of the vapor barrier. Gaps, misalignments, or poor overlaps can allow moisture to seep in, defeating the purpose of the barrier. It is essential to take time during installation to make sure that all edges are securely fastened and that overlaps are adequately sealed with durable tape.
Addressing Insulation Concerns
Another common challenge is ensuring that any insulation present in the crawl space does not become saturated or compromised. Moisture can condense on cold surfaces, leading to insulation degradation. When installing a vapor barrier, consider adding insulated panels to the walls or using closed-cell foam insulation for better moisture resistance, keeping the area dry and energy-efficient.
Maintaining Your Vapor Barrier
Regular Inspections
Once the vapor barrier is installed, regular inspections are crucial to ensure its continued effectiveness. Check for any signs of wear or damage, including tears, separations, or moisture accumulation near drain systems. Regular maintenance helps in identifying potential issues before they escalate, allowing for prompt repairs or replacements.
Signs of Wear or Damage
There are several indicators that a vapor barrier may need attention. These include visible tears or punctures in the material, signs of mold growth, or increasing humidity levels within the crawl space. If any of these signs are present, it’s best to evaluate and repair the vapor barrier swiftly to maintain a healthy environment.
When to Replace or Repair
Repairing or replacing the vapor barrier should be based on its condition and effectiveness. If small sections are damaged, patching may suffice. However, if extensive damage exists, or if the barrier has shown signs of significant wear, a full replacement may be necessary. Always prioritize maintaining a reliable barrier to prevent moisture problems.
FAQs
How long does a vapor barrier last?
A vapor barrier can last several years if installed correctly and maintained properly. Regular inspections can help prolong its lifespan.
Do I need a permit for vapor barrier installation?
Permits vary by location. Often, permits are not needed, but it’s wise to check local building codes to ensure compliance.
Can I install a vapor barrier myself?
Yes, with the right tools and safety measures, many homeowners successfully install vapor barriers independently, saving on labor costs.
What materials are best for a vapor barrier?
Plastic sheeting, typically polyethylene, is commonly used. The thickness can vary, but 6 mil is standard for most applications.
How does a vapor barrier affect home energy efficiency?
A proper vapor barrier can significantly improve energy efficiency by preventing moisture-related issues that lead to energy loss and higher utility bills.